- Click on the New Incident tab to begin entering an incident request.
- Identify where the work needs to be done by choosing the Location.
- If your organization utilizes the Building field, select one from the drop down box.
- Choose the general Area type that best fits the location of the work request.
- Enter the specific area in the Area Number field. The Area Number field is alphanumeric and is where you can enter specific room names or numbers.
- If the incident is related to an Asset being tracked in Incident, select it from the Asset Inventory drop down box.

- Select the appropriate Problem Type to identify what type of work is being requested.
- Please describe your problem or request in the open text box.

- If available, choose the Purpose Code that best describes why the incident is requested.
- If applicable, enter the Requested Completion Date.
- If available, select the Budget that will be used for costs allocated to complete the request.
- If a Questionnaire appears on your form, answer the questions by providing additional information on the issue you are reporting based on the problem type you previously selected.

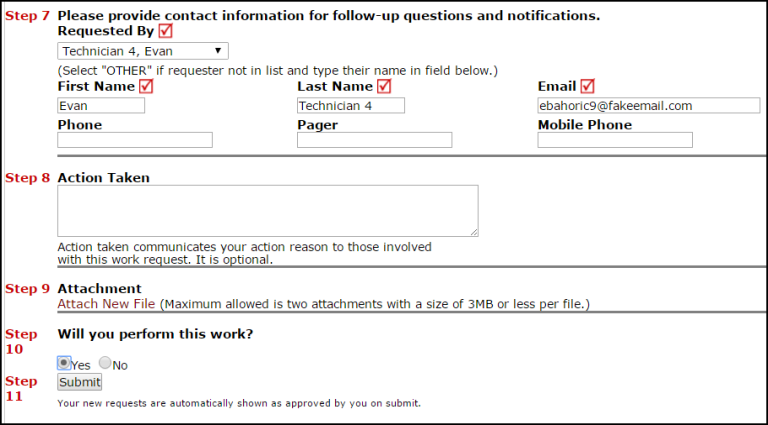
- Contact Information will automatically populate based on your participant information.
- Enter an Action Taken if you have already completed this incident.
- If the option has been made available, you can add an Attachment to your incident.
- You will be prompted to answer Will you perform this work? Selecting Yes will automatically assign the incident to you. Selecting No will send the incident through the automatic routing rules.
- Click Submit to save the incident.

